Set Up Windows 7 to Share and Connect to Files
Windows 7 lets you share files through a combination of its public folders and manual selection. If you want to share files with everyone on your network, just move them to the public location within any of the Libraries in the left pane of a window.
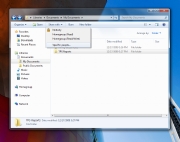
You can also share files or folders wherever they reside. Select an item to share, and pick the Share with menu at the top of the window. PickHomegroup (Read) to let people on your home network open, but not modify files. Pick Homegroup (Read/Write) to let people open and edit files.
Pick Specific people if you want to restrict access to certain user accounts. If you hadn't earlier, you'll need to create a new login and password for people who can access these files. Go to the User Accounts and Family Safety Control Panel, then pick Add or remove user accounts. Click Manage another account, and pick Create a new account.
Follow the prompts to create a Standard user, pick the account, and click Create a password. Now if you pick Share with: Specific people, click the drop-down arrow, and add the new account to the list.
Next, try connecting to files. If you're on the same HomeGroup as another Windows 7 PC, just open a new window, and look in the Homegroup area on the left. Pick the PC, and browse the shared libraries inside. (Learn more about setting up a HomeGroup here.)
If the other PC isn't connected through a Windows 7 HomeGroup, you can browse through the Network tab a little lower on the left pane to find it.
Set Vista and XP to Share Files and Folders
Here's how to prepare Windows XP and Vista to share files and folders with Windows 7. In XP, you can share files on the network by dragging them into the Shared Documents folder. Or, you can activate sharing manually at the file locations.
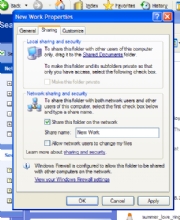
Right-click the file or folder you want to share, and pick Sharing and Security. Click the checkbox to Share this folder on the network. If you want others to be able to modify--or add--content, click the box to Allow network users to change my files. Click OK. To turn off sharing, open the same menu and unclick the checkbox.
In Windows Vista, you can also copy files to your Public folder to share with anyone on the network. To selectively share items, right-click the file or folder, and pick Share. Pick the user accounts for people who should have access from the drop-down menu, and click Share.
To retrieve files hosted from a Windows 7 system, look in the Network browser within XP or Vista.

